


When batch functionality is enabled for a material Item, you can make the assignment of a batch number mandatory for a range of workflow options. Please contact support to turn on the batch function.
Want to view this guide all at once?
Download PDFStep 1.
Go to Company under Global settings, click the Sales and Purchases tab.
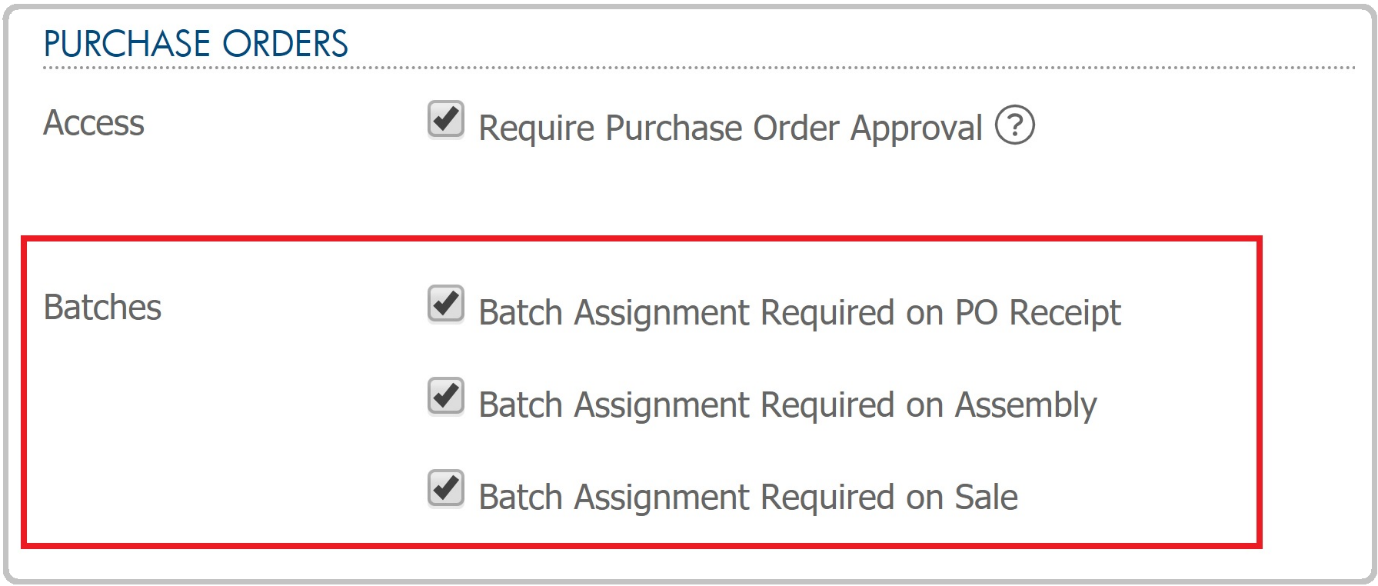
Go to the purchase orders section.
Select the workflows required within your organisation for enforcing the entry of batch numbers at the different workflow stages.

Step 2.
A Material Item must be Managed to have a Batch Number. Batch numbering functionality is not relevant to Unmanaged Materials within Tidy.
On a Material in Edit mode, tick the Batches Enabled box to enable batch numbers on the Material item, then select the optional Production Date and Expiry Date fields.

Step 3.
A Batch icon will now appear on the Material header row.

Step 4.
Clicking the Batch icon will open a screen where you can assign the batch data. Either assign to an existing Batch Number or create a new Batch Number.

Step 5.
As all Assemblies are Managed, they can have batch numbers enabled.
On the Assembly in Edit mode, tick the Batches Enabled box to enable Batch Numbers on the Assembly, then select the optional Production Date and Expiry Date fields, as with a Material Item.
Clicking on the Batches icon in the header row will show you the existing batch data and allow you to create new batches.
Want to learn more? Check out these related guides


